

Set up the engraving studio
Use the Personalization preview section for a live engraving preview, and the engraving product template for pieces that take an engraving.
An engraving studio for one product: the shopper picks a shape, types up to three lines, chooses a lettering and sees the words on the photo as they type. The engraving is saved on the order.
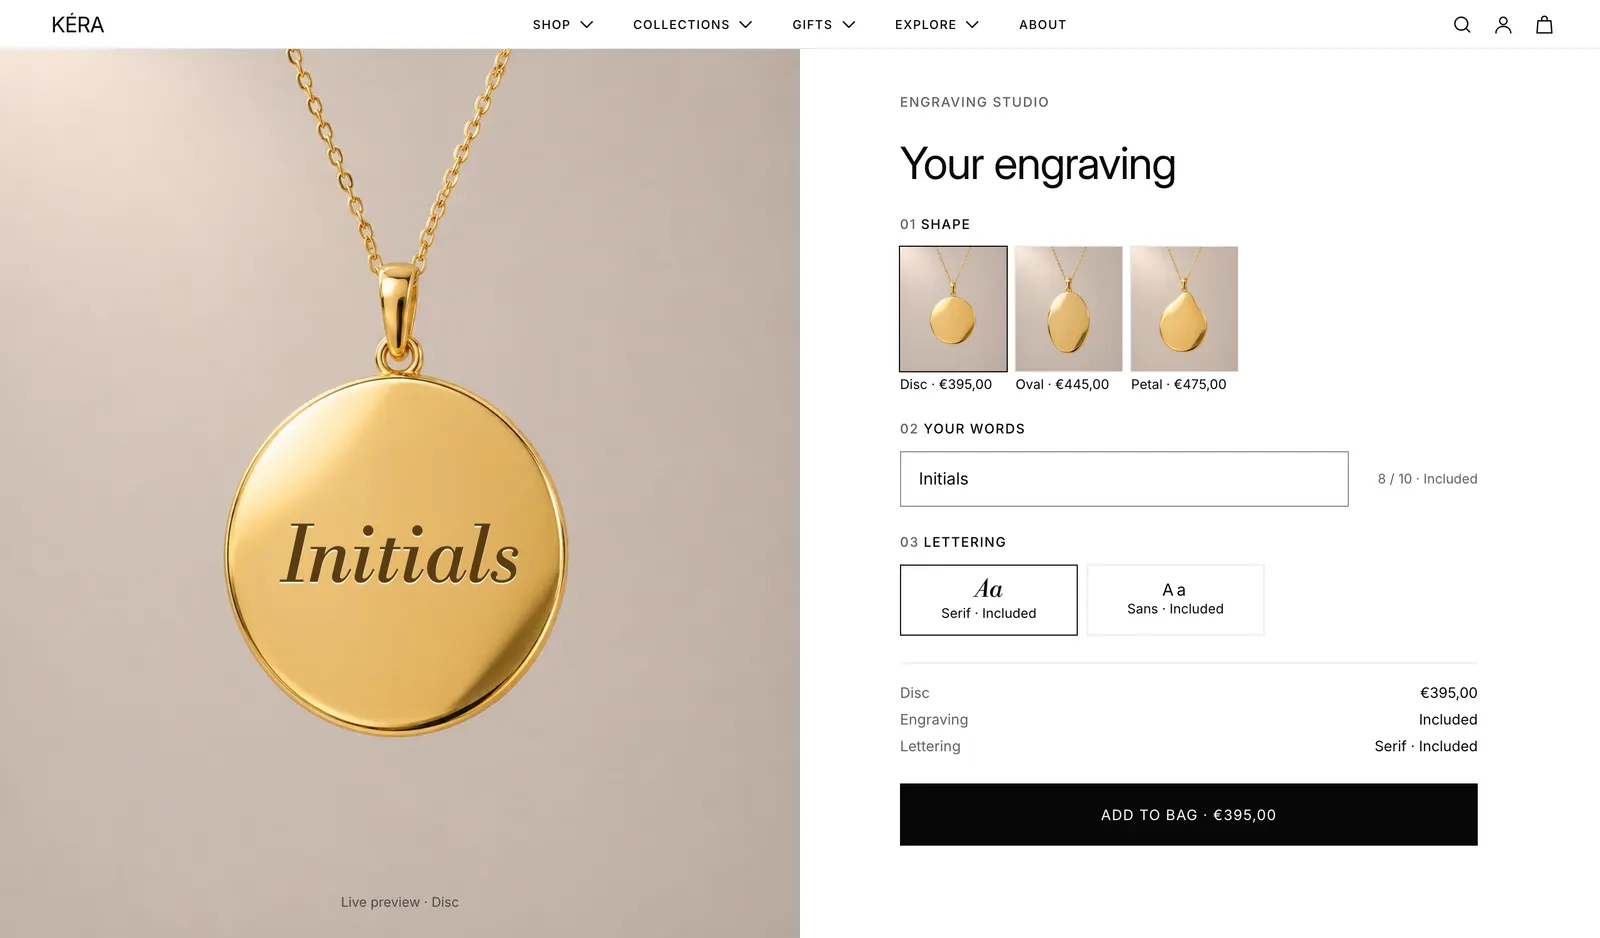
Set it up#
- Add the Personalization preview section and choose the Product. Give each variant its own image so the preview changes with the shape.
- Select the Engraving block (or click the words in the preview). Set Horizontal position, Vertical position, Engraving area width and Engraving area height to fit the face of the piece.
- In each Line block (up to 3), set the Label, Characters and, to charge for it, an Add-on product.
- In each Lettering block (up to 3), choose a Style and, if it costs extra, an Add-on.
Settings#
Section settings
| Setting | What it does |
|---|---|
| Color scheme | Colors of the section. Default scheme 1. |
| Product | The product to engrave. Each variant shows as a shape, with its image. Until it's set, the section shows only in the editor. |
| Image position | Left (default) or Right. |
| Eyebrow | Small text above the heading. Default "Engraving studio". |
| Heading | The section heading. Default "Your engraving". |
| Heading size | Extra large, Large, Medium (default), Small or Extra small. |
| Material | Shown after the shape under the preview, for example "Live preview · Oval, 18k gold". |
| Fine print | Small text under the add button. |
Engraving block settings
| Setting | What it does |
|---|---|
| Horizontal position | 0 to 100%, default 50%. |
| Vertical position | 0 to 100%, default 60%. |
| Lettering size | 50 to 200%, default 100%. |
| Space between lines | 0 to 100%, default 10%. |
| Engraving area width | The face of the piece as a share of the photo. 10 to 100%, default 35%. Words too long for the area shrink to fit. |
| Engraving area height | 10 to 100%, default 30%. |
| Engraving color | Blended into the photo. Default #73541f. |
| Finish | Engraved (default), Deep cut, Laser or Flat. Engraved and Deep cut add a bright edge under each letter, as on polished metal. |
Line block settings
| Setting | What it does |
|---|---|
| Label | Shown in the field and the price summary, for example "Initials". Default "Engraving". |
| Sample text | Filled in to start with. |
| Characters | The most characters. 2 to 30, default 10. |
| Size | The line's lettering size, 30 to 100%, default 100%. A smaller size suits a second line such as a date. |
| Add-on | A product added to the bag when this line is filled in. Empty includes the line for free. |
The first line is required; the others are optional.
Lettering block settings
| Setting | What it does |
|---|---|
| Style | Serif (default), Sans or Script. Sans uses the theme's body font in capitals. |
| Font | The font for Serif or Script. |
| Add-on | A product charged when this lettering is chosen. Empty includes it. |
Every setting: Personalization preview reference.
Good to know#
What goes in the bag?
The chosen shape, with notes on the item: "Engraving" for the first line, each other line under its Label, and "Lettering", for example "Lettering: Script". Plus one of each add-on for filled lines and the lettering, marked "For:" with the shape and first line. Then the bag follows After adding to the bag (Cart drawer and cart page).
How should I set up add-on products?
One product per paid extra. Keep them out of collections and hide them from search with seo.hidden (see Metafields).
Is there a simpler engraving product page?
Yes: Engraving and add-ons.
Where do I see the engraving on the order?
In Shopify admin, under the engraved item on the order.